
Need to Resize Images in Various Ways? Give Preview a Try
Even those of us who don’t work with graphics professionally often find ourselves needing to resize images. Perhaps you have a large square headshot, but the site to which you’re uploading requires it to be exactly 100 by 100 pixels. Or maybe you have an iPhone 13 Pro photo that’s 4032 by 3024, but you need the long side to be 1280 pixels and the short side to be 800 pixels. You might even need to cut out an 800-by-600 rectangle from a much larger image.
These tasks are easily accomplished with professional graphics apps like Photoshop, but you don’t need to pay for or learn Photoshop for a quick resizing and cropping of an image. That’s because Preview, which is built into macOS, can do many of these tasks with aplomb.
One note: You can resize images to be smaller with little or no loss of quality, but you can’t make images bigger without them looking fuzzier unless you employ specialized tools.
Shrink an Image without Changing Aspect Ratio
Let’s take our first example above. We have a square headshot that we need to upload to an account, but the site won’t accept an image larger than 100 pixels square. To shrink the image to the specified size, we’ll first make a copy in the Finder or we’ll open the file in Preview and choose File > Duplicate. Then, with the image open in Preview, we’ll choose Tools > Adjust Size, make sure “pixels” is chosen to the right of the Width and Height fields, and enter 100 into the Width field. Because Scale Proportionally is selected, Height automatically changes to 100 to match. We’ll click OK to exit the dialog and then save the file.
Shrink an Image and Crop to Different Dimensions

Let’s move on to our second example above. We have a photo of some home-baked bread loaves that we’ve taken with the iPhone, and we need to resize it to 1280 by 800 pixels before uploading it to our food blog. There are two problems: the image is much larger than we need to start, and when we try resizing it to the desired pixel count in one dimension, the other dimension is wrong.
We’ll start the same way we did before, by making a copy of the original and in Preview choosing Tools > Adjust Size. In the Image Dimensions dialog, we’ll first type 1280 into the Width field. In this example, doing that causes the Height field to change to 752, which is too small (below left). Remember, shrinking images is easy and works well, but expanding them is hard. So instead, we’ll type 800 into the Height field, which causes the Width field to change to 1361 (below right). That’s good; we’ll click OK to resize the image. It will look small, but we can zoom it back to the window size by choosing View > Zoom to Fit.

For the next step, we need to get the image width down from 1361 to 1280 pixels, which we do by cropping. Choose Edit > Select All (or just press Command-A), and notice that there’s a selection rectangle around the entire image, with blue drag handles in the middle of each side and at each corner. We’ll need to take some off each side to keep the loaves centered, so we’ll drag the left side in a little to start. If you have trouble grabbing the blue drag handles instead of the edge of Preview’s window, choose View > Zoom Out to zoom out one step and separate the handles from the window edges.
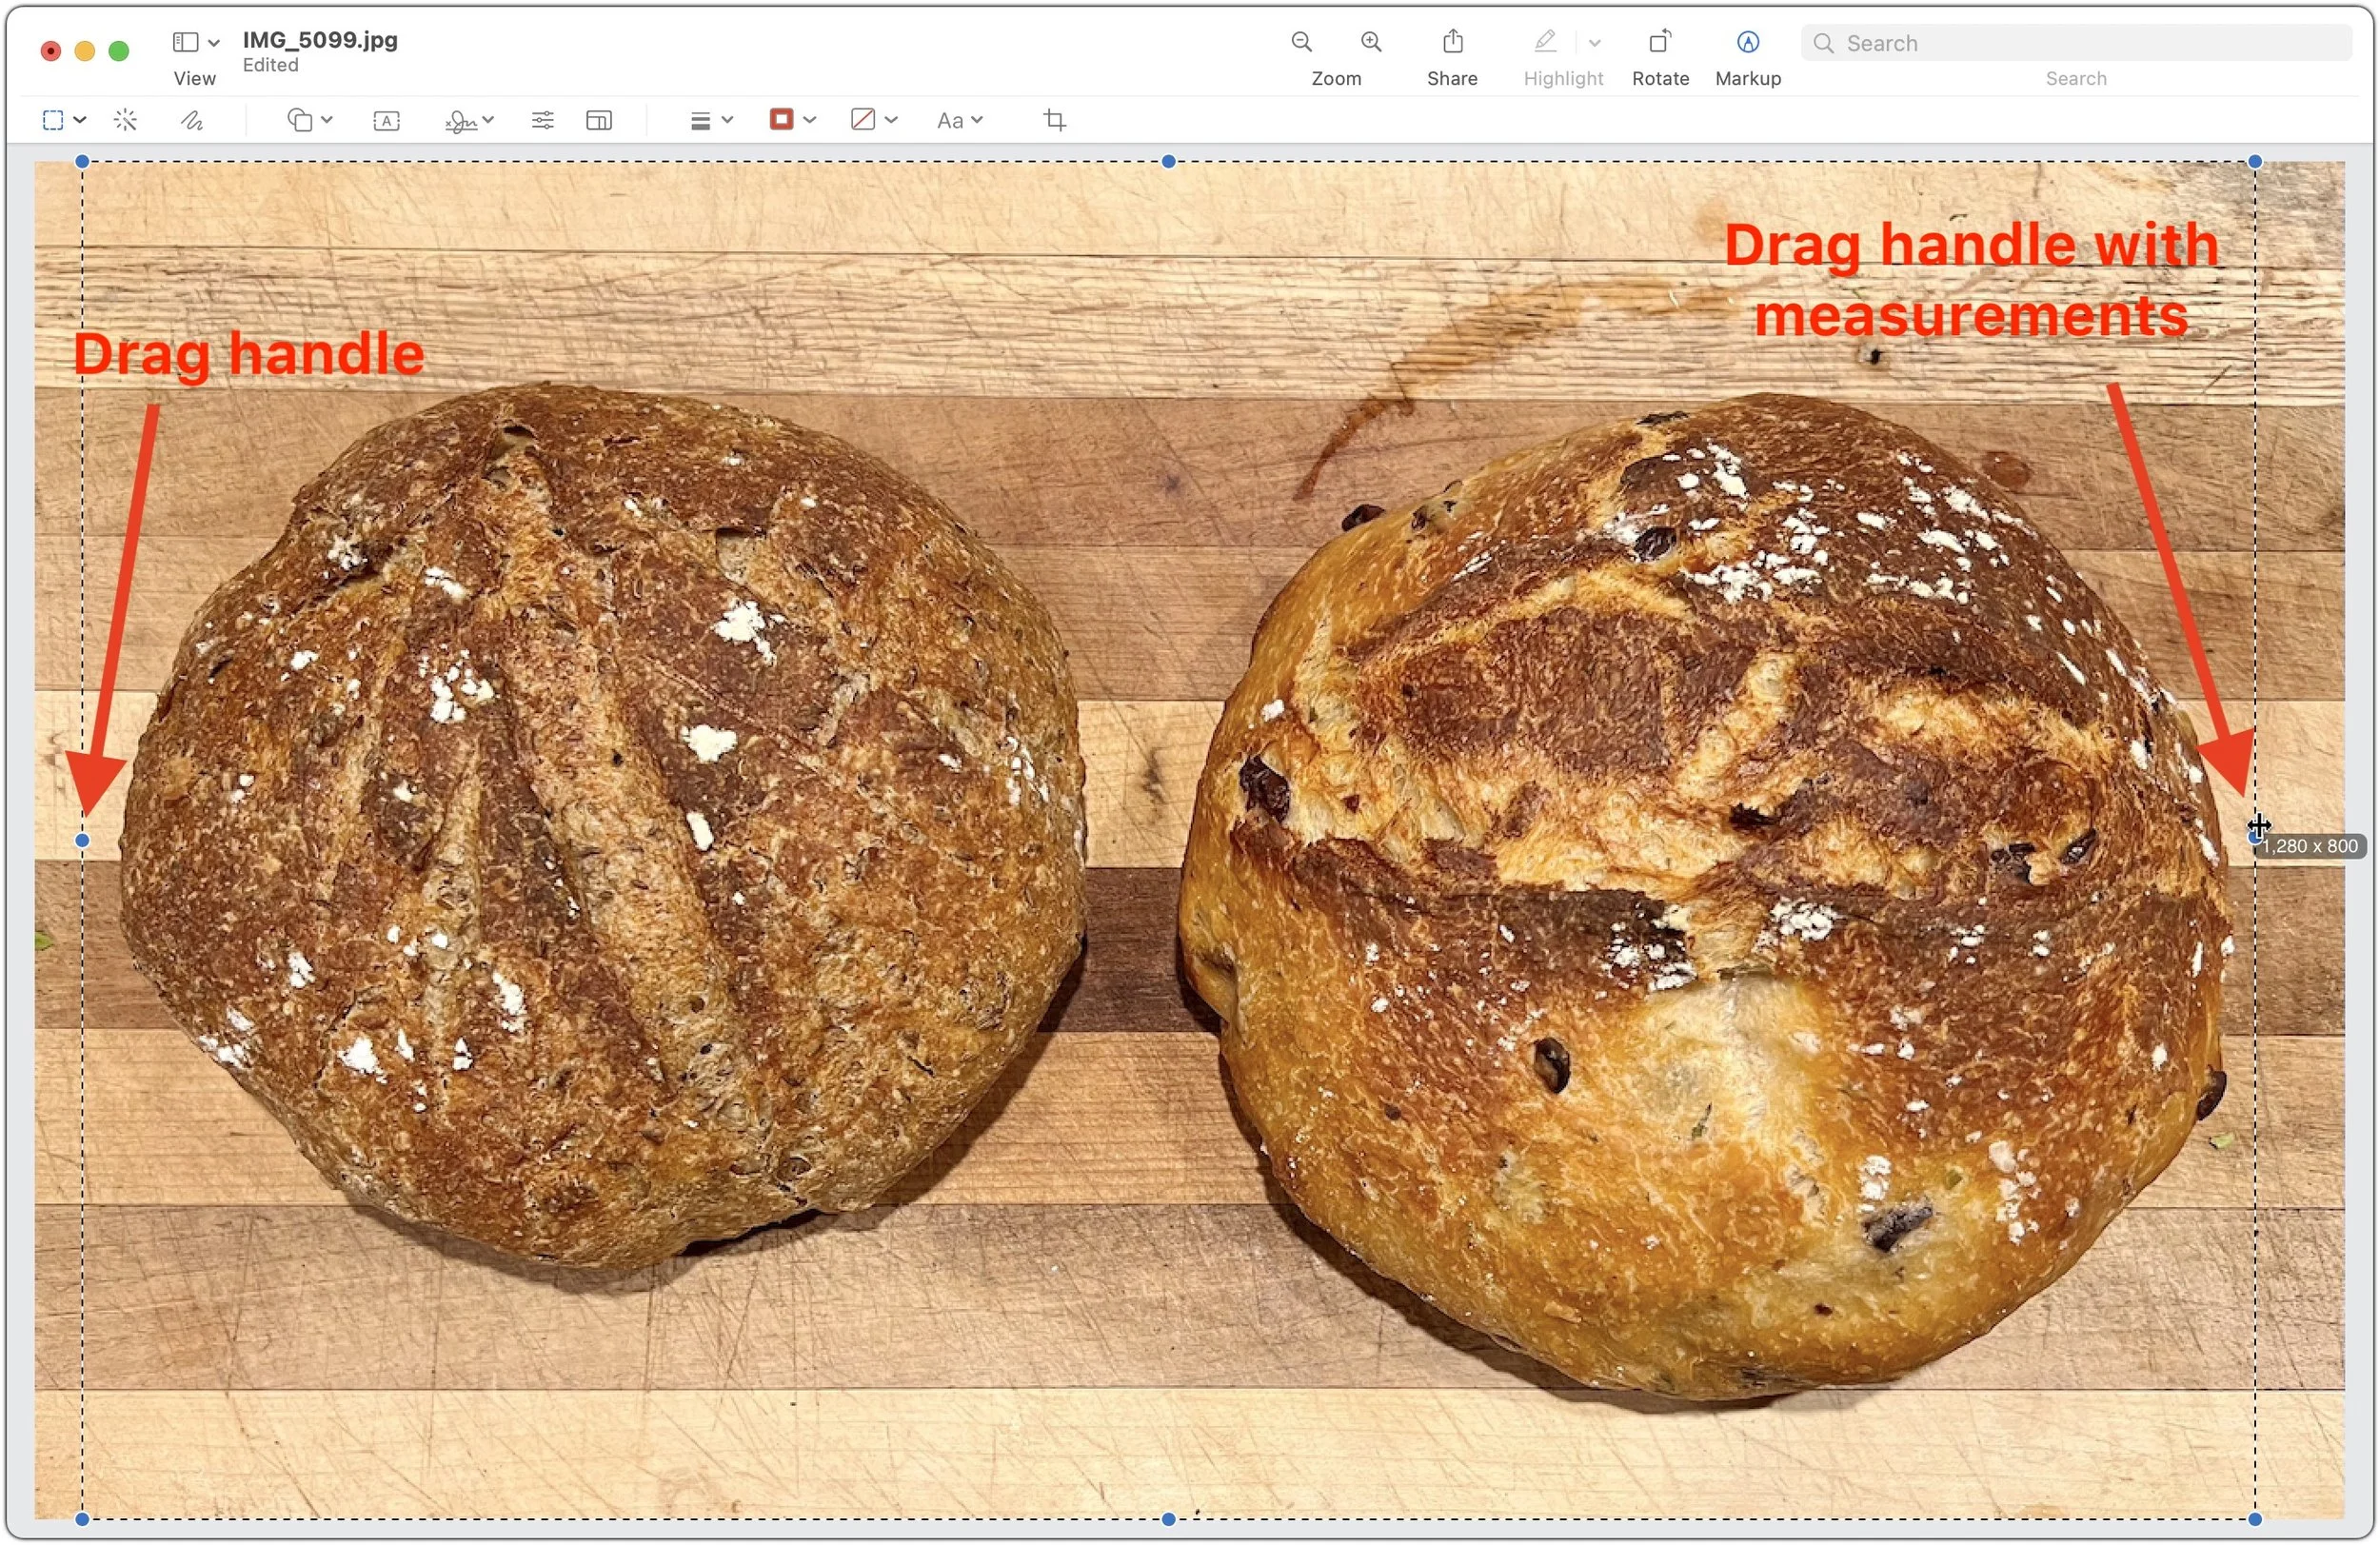
Next, we’ll drag the right side in. Notice that as we drag, Preview displays the image dimensions in a little lozenge (at the right in the screenshot)—we’ve stopped at 1280. Since we’re moving only the edges, only the width changes—resizing from the corners would be much harder because both dimensions would change simultaneously.
One tip. If you’ve gotten the selection rectangle to 1280 by 800, but the content under it isn’t centered as you’d like, press and hold the left or right arrow key to move the selection rectangle to the left or right.
Once we have the selection rectangle at the right size and in the right place, we’ll choose Tools > Crop to discard the image content outside the selection.
Extract a Portion of an Image with Specific Dimensions
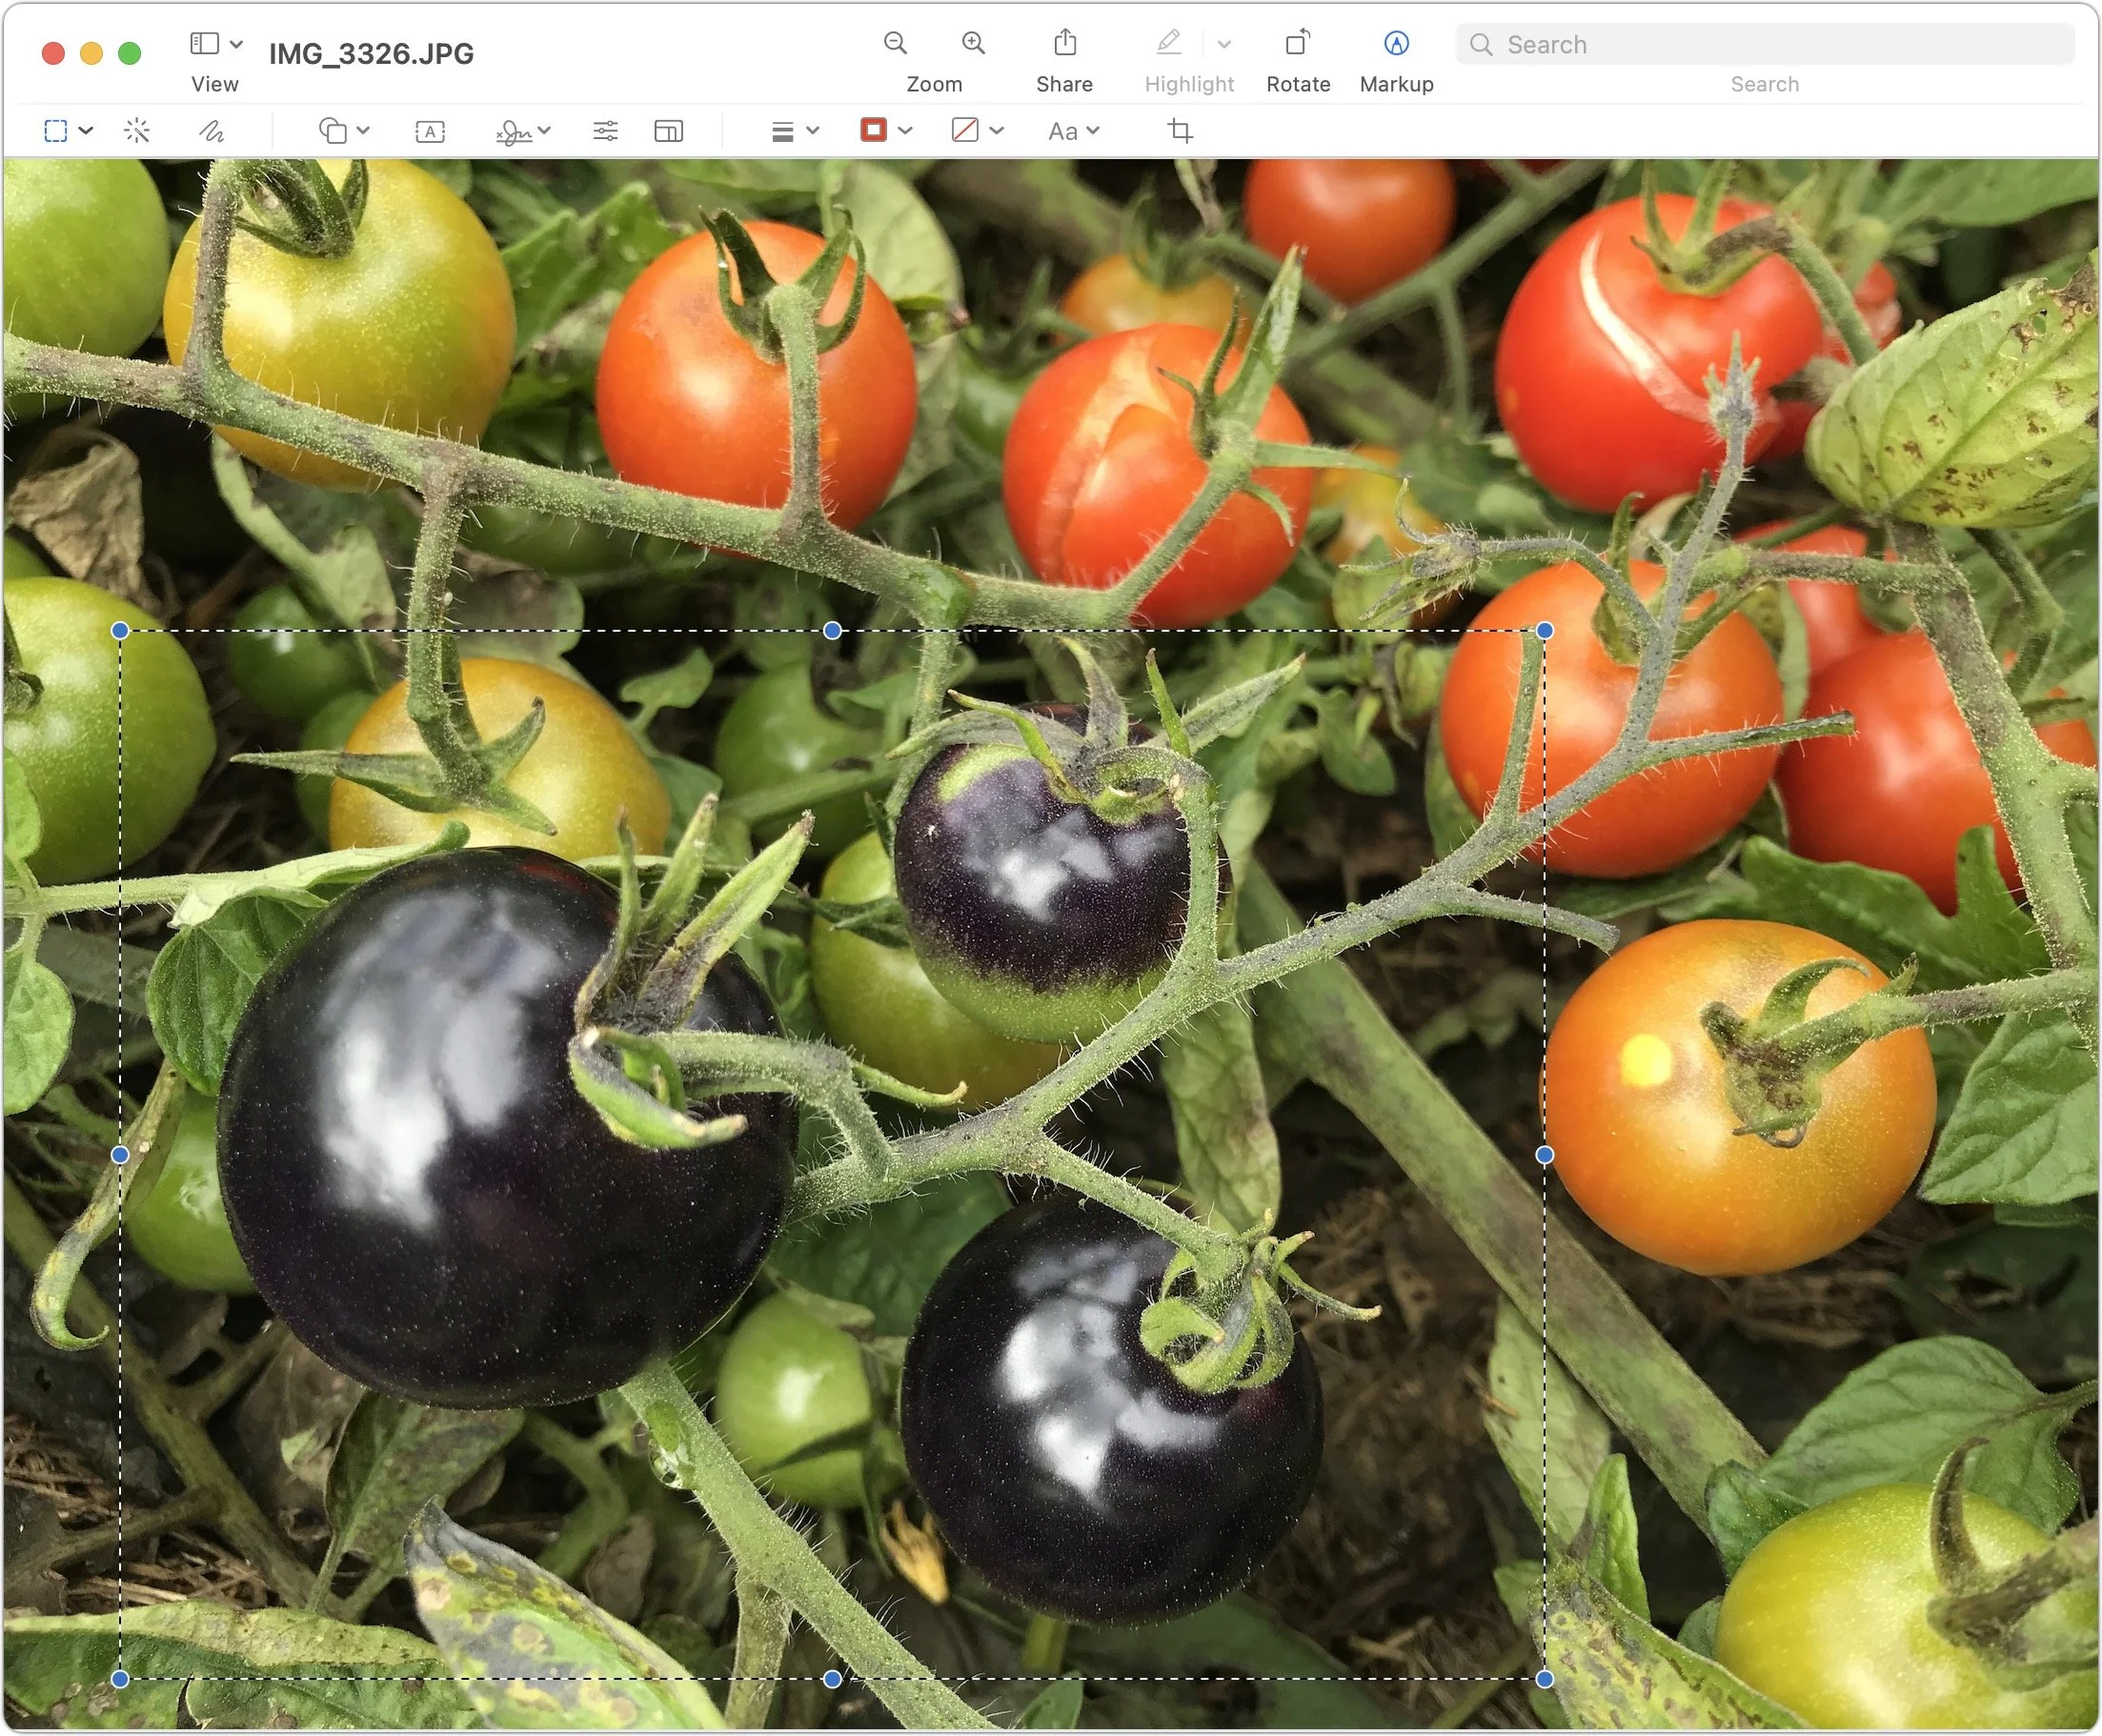
For our final example, let’s assume that we have a large picture of cherry tomatoes, and we need to cut out just the black tomatoes for a Web page that requires an 800-by-600 image. Once again, the image is too large, but the trickier problem is that we only need a small portion of it.
We’ll start by dragging out a selection rectangle that’s roughly 800 by 600, using Preview’s measurement lozenge. All we’re doing here is getting a sense of what the shape of 800 by 600 looks like. Then we make another selection around the black cherry tomatoes that’s roughly the same aspect ratio, wider than it is tall. The details don’t matter much at this point.
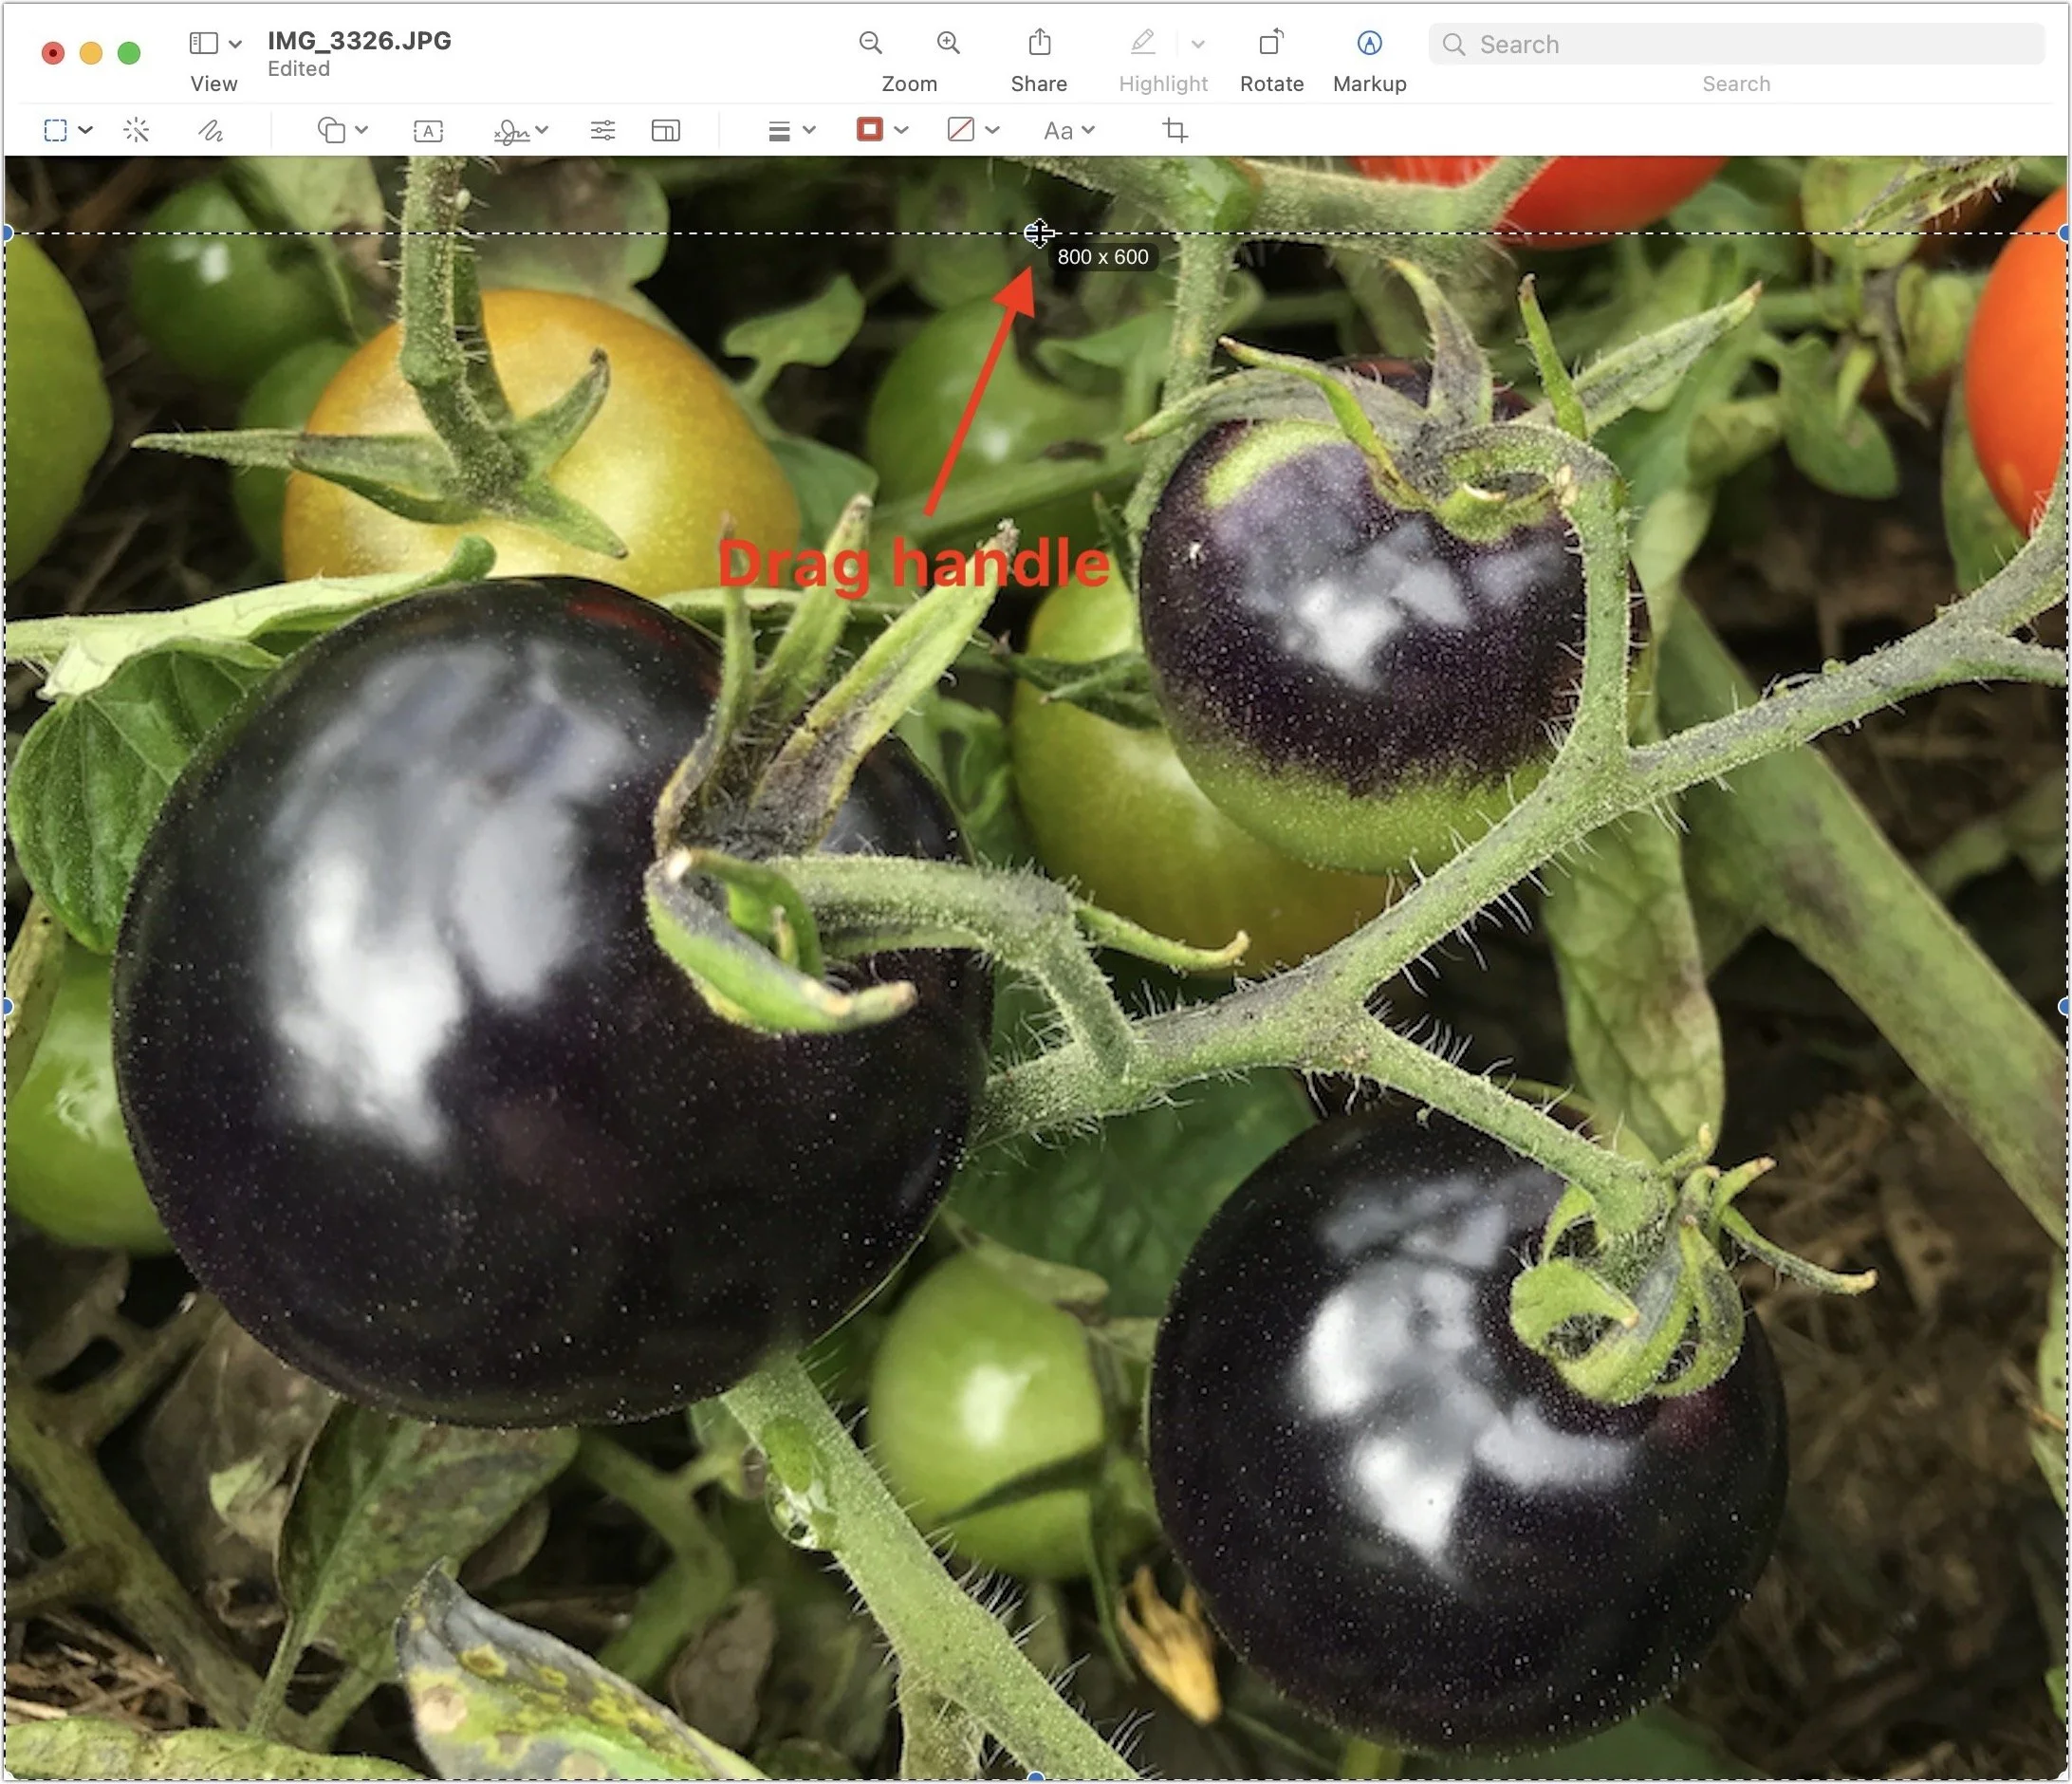
The next step is to crop the photo to the selection with Tools > Crop. Then we choose Tools > Adjust Size and set the Width field to 800 to get the width correct. That reveals that the height of our rough crop was slightly too large, at 630 pixels. We’ll click OK to resize the image to those dimensions.

Finally, we’ll use the same technique we did in the example above, with Select All, dragging the top handle down until the dimensions are 800 by 600, and then using Tools > Crop to discard the extra content.
As you can see, you can do a lot with just three basic techniques in Preview:
Using Tools > Adjust Size to resize the entire image
Dragging out selection rectangles while paying attention to the measurements
Using Tools > Crop to get rid of content outside the selection rectangle
We won’t pretend that Preview is the ultimate graphics tool, but it’s capable, easy to use, and on every Mac.
(Featured image by iStock.com/Gearstd)